Now Bansiyi Overseas LLP (BOL) with Andrea brand is certified and success fully published Environment product Declaration ( EPD) and Health Products Declaration ( HPD) of our SPC Vinyle tiles by SCS Global Service, USA.
Laying Instruction
Tiling Tips for laying tiles

Laying Guide
YOU WILL NEED
Tiling Tips
PREPARATION
PREPARATION FOR CONCRETE FLOORS
Allow new concrete floors to fully cure before tiling (minimum of 28 days per 75mm of concrete). If tiling over old concrete remove contaminants by etching with diluted hydrochloric acid. 1:2 with water. For really smooth concrete etch with diluted hydrochloric acid 1:2 with water, allowing the surface to be etched for at least 15 minutes or until the reaction has stopped. Test a small area first. Wash the area thoroughly with lots of water and scrub with a hard brush to be sure all traces of acid and contaminants are removed. Let the surface dry out. Repair any cracks before tiling.
PREPARATION FOR WOODEN FLOORS
It is okay to tile direct on to structurally sound tongue and groove, sound particle board or plywood sheeting providing there is no excess movement. Normally the allowable movement needs to be less than 1/360th of the span between floor joists, or about 1 to 1.5mm maximum. Sand painted floors to remove paint and contaminates. Make sure all areas are well nailed and are clean and dust free. Prime timber floors with a primer or primer/grout additive to ensure a good key to the flooring material.
WATERPROOFING BEFORE TILING WET AREAS
t is important that wet areas are waterproofed prior to tiling. Timber floors can swell up and lift the tiles and may rot over a period of time if not waterproofed first.
PLANNING IS THE MOST CRITICAL PART OF THE WHOLE JOB
Remember you can make pencil marks on the wall and floor because they are going to be tiled over. With floor tiles, lay out a few rows in each direction and see how they look and how different areas to be tiled flow into each other. With wall tiles it is important to make sure you start from a level base. BRANZ, the Building Research Association of New Zealand put out an excellent book called “Good Tiling Practice” which is well worth while if you are doing a reasonably large job or multiple areas.
SETTING OUT THE JOB
The setting out the tiles is one of the most important parts of the job. Set out from the centre and work out towards the edges of the room. This will compensate for walls that may not be square and make the job look more balanced. Find the centre of the room and then lay a row out in each direction to help determine where to place the tiles from the centre point that will give you the most even border and the largest pieces when you reach the walls. Try to avoid small or narrow pieces whenever possible.
If you are laying a border tile first, find the centre of each edge and then either centre a border tile or a grout joint on the centre line to see which will give you the best layout when you reach the corner of the room
Laying a 1/4 to 1/2 plain tile around the perimeter and then the patterned border before filling in the central area with plain tiles on the diagonal means your border and your tiles do not have to be the same size. Tiles laid diagonally will generally use 5% more tiles than tiles laid square to the room.
Don’t forget to allow for the space of the grout joints and a perimeter expansion joint. Normally you would allow 3-5mm for inside tiles, 5-10mm for outside tiles or even more for very large or irregular tiles. For handmade terracotta, slate or irregular tiles, allowing at least 3-5 times the variation in the size of the tiles is a good idea. You don’t want to have a 3mm joint in one place and nothing in another.
As a buying guide work out the net area and then add 10% extra tiles for square laying and 15% extra for diagonal laying. This should give you enough tiles for cutting and some spares. The waste percentage may vary if your room has lots of odd angles or is an unusual shape
HOW TO LAY FLOOR TILES
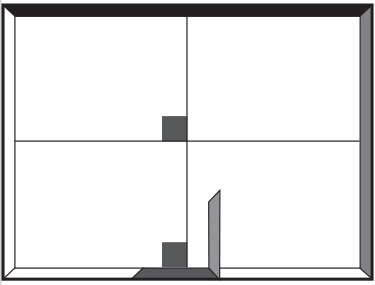
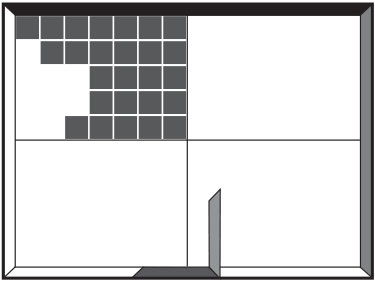
Set out lines at right angles to doorway and centre of room. Tiles should start at the centre of the floor, working out to the walls.
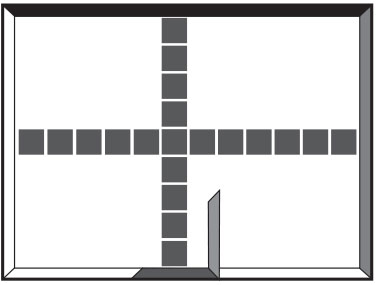
Place a row of loose tiles along each line. Reposition guide lines to avoid small cuts at ends.
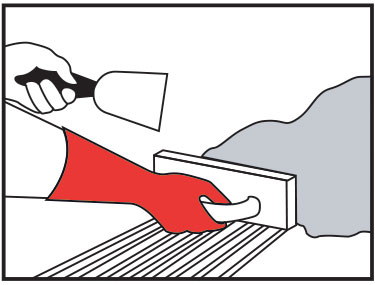
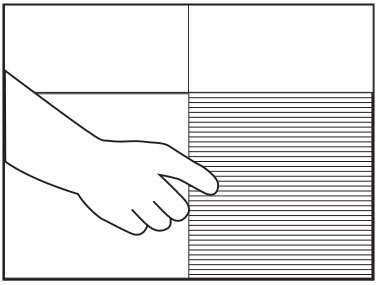
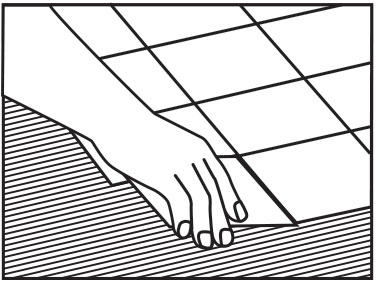
Starting at the centre of the room spread a square metre of adhesive using a notched trowel and work to walls.
Set out lines at right angles to doorway and centre of room. Tiles should start at the centre of the floor, working out to the walls.
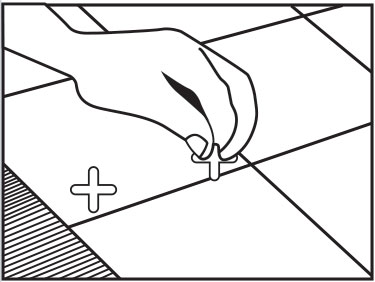
Use tile spacers to create uni- form spacing. Remove before grouting.
Lift a tile from time to time to check for adequate coverage. No voids should occur under- neath the tiles.
Tile out from centre line to edges, keeping mark straight and spacing even
Put the tile to be cut upside down in gap near the wall. Mark where to be cut. Allow for spacing.
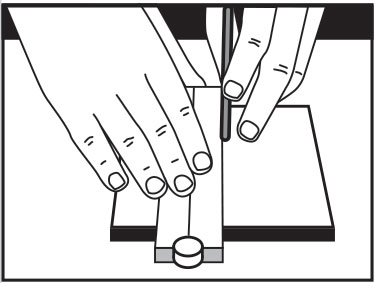
Score line with a tile cutter on face of tiles.
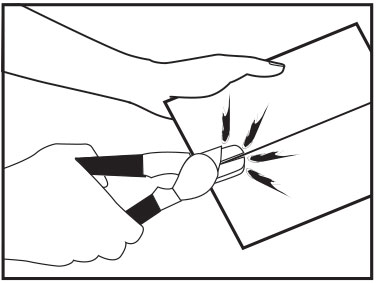
Use a tile cutter which are generally available from your tile merchant.
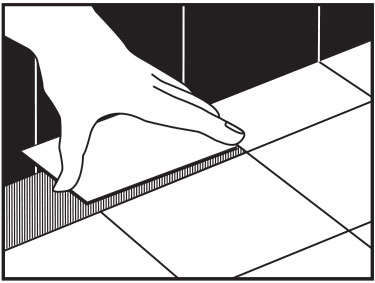
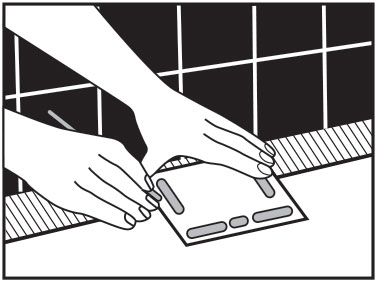
Butter the back of the tile with adhesive, place cut edge against wall and press firmly into place. Allow adhesive to dry before grouting.
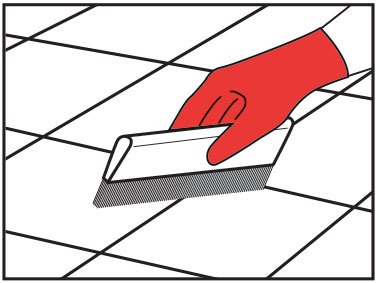
Use selected grout. Work grout diagonally into the joints using rubber spreader.

Clean off grout with a damp sponge and when grout lines are dry polish off with a soft cloth.
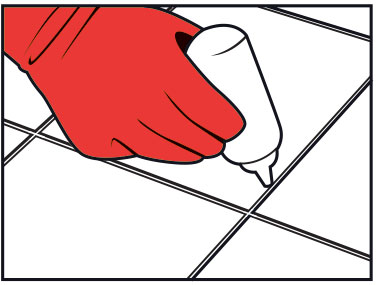
After the grout has cured, approx 48 hours, use grout sealer over the grout joints
- 18/19 - Pacific business park, 8A Kandla National Highway, Nr. The Fern Residency Hotel, Morbi -2(363642), Gujarat
- Phone: +91 97129 89419
- Email: [email protected]
useful links
Andrea is the ultimate SPC vinyl flooring tiles, LVT, Ceramic and Tiles and Sanitary ware products Exporters in India. It is one of the trusted brands of sanitaryware that can elevate any normal house into a dream house in no time. As manufacturers and dealers, Andrea leaves no stone unturned in meeting the needs of our customers.
We, as a Global Manufacturer and exporter in the field of SPC vinyl flooring tiles, Wall Tiles, Floor Tiles, Parking Tiles, Slabs , Sanitary ware, etc. Brings to you the best designs that will add beauty to every nook and corner of your house. Whether your house has a traditional or modern feel and touch, you have just the right sanitary ware products with us to meet your needs and requirements. If your goal is to convert boring and dull-looking houses into stylish and luxurious houses, Andrea has you covered.